Monday, October 31, 2011

Pumpkin-Chicken Chili

Double the recipe for a big batch.


This isn't instant chili.  If you want that, go to Wendy's or check out my Chili Now! recipe.  But neither is this the hours-long simmering concoction folks entering chili contests prepare.  (But go ahead and enter this one.  Long as you share the prize money.)  It's about an hour and maybe a little change.  Depending on how quickly you chop and how long you want to wait before eating. Could be less.  My cooking was delayed by puppy-sitting and a bit of travel.  Hence the hiatus in the blog.   Forgive me?

Our girl, Gabby (left) isn't so sure about the newcomer.
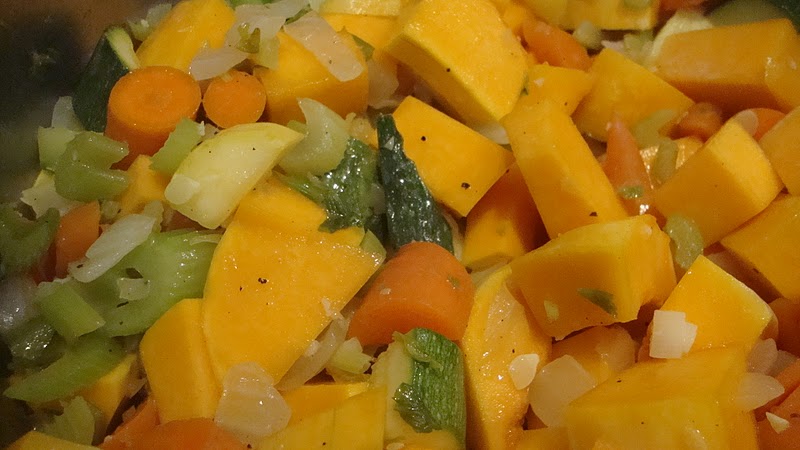
One of the best things about this chili is that it's made with your tastebuds and health in mind.   Boneless chicken thighs sub for beef and lots of vegetables make up the rest.  Zucchini, red peppers, pumpkin (or butternut squash if you'd rather), black beans, chick peas, and the usual suspects (onions, celery, garlic, tomatoes) abound.  If  company's coming, double the recipe for about 6 or 7 quarts of chili.  Otherwise, you'll have about three.  Which should suit you fine.   On Halloween or any other day. 


Ipad taking place of spiral notebook starting today.  Imported via email.


Ingredients:
  • 4 teaspoons olive oil
  • 1 1/2 stalks celery, chopped
  • 2 oz button mushrooms, quartered (1/4 of a regular cardboard container)
  • 2/3 cup fresh pumpkin, cut into 1/2" dice (can sub butternut squash)
  • 1 small zucchini, cut into 1" dice
  • 1/4 teaspoon sea salt
  • 1/4 teaspoon freshly ground black pepper
  • 1 clove garlic, minced
  • 1 tablespoon chili powder (or to taste)
  • Pinch of crushed red pepper
  • 1 1/2 teaspoons Dijon-style mustard
  • 1/2 cup EACH white wine and water 
  • 1/2 cup pureed pumpkin, optional
  • 1 28 oz cans chopped tomatoes 
  • 3 boned, skinned chicken thighs
  • 1 15 oz can drained chick peas or black beans (1 of ea if doubling)

Directions*

1.  Heat 2 t of the olive oil in an 8 or 10 qt stockpot over medium heat, reserving other 2t for cooking the chicken.
2.  Add celery, onions, peppers, mushrooms, pumpkin and zucchini.  Season with salt and peppers.  Stir in water, wine,  Dijon-style mustard, and pureed pumpkin, if using.
3.  Pour in tomatoes.  Stir and bring to a boil. Lower heat, cover, and simmer 10 min.
4.  Meantime, heat a  skillet over medium-high heat with the rest of the olive oil.  Salt and pepper well the chicken thighs and place them in skillet.  Cook about 5 minutes on each side and turn down heat.  Cook until chicken is cooked through and no pink remains, about 5 more minutes.  Remove from skillet, cool briefly and dice.  Add to stockpot.
5.  Drain the chickpeas or black beans and add to the stockpot.  Stir well. Bring back to a boil and lower heat.  Simmer 15 -30minutes until all vegetables and chicken are tender.  Taste and adjust seasonings.
6.  Ladle chili into bowls and serve with a bit of grated cheddar or a teaspoon of sour cream.   Place a bottle of hot sauce at the table if you like things spicier.


*Crock-pot Directions:   Make a double batch and use a 6 qt. crock-pot.  In a large pot or skillet, saute onions, celery and garlic with chopped fresh boneless chicken thighs.  Cook until chicken is cooked through, stirring often.  Place in chicken mixture in crock-pot and stir in remainder of ingredients (other vegetables, tomatoes, etc.)  Do not add beans.  Add seasonings, but go easy on them as the crock-pot intensifies the spices.  Cook on low for about five hours and add drained beans during last hour of cooking.

Wine:  Dry Riesling or a lighter Zinfandel

Enjoy cooking and taking care of yourself,
Alyce

Thursday, October 13, 2011

Pork Tenderloin with Lentils and Vegetables

Festive fall food for the Solo Cook.  You probably don't want to cook a big pork loin and roasted vegetables (unless all the gang is coming,) but you might want to fix a smaller pork tenderloin and an all-in-one side brimming with legumes and sauteed vegetables that you can also take for lunches.  Sometimes in the summer I make a lentil salad and, while I was thinking about that salad, I came up with a colder weather version that's warm and inviting--despite the fact that there's still a bit of lemon juice squeezed in at the end.  Summer isn't that far away.

One of the beauties of this meal is that, if you want to, you can come home and fix it.  Pork tenderloin is a very fast meat to cook.  Seared on top of the stove and then roasted for a bit more, it's done in perhaps 20 minutes.  If that doesn't appeal, you can simply roast it for about 45 minutes at 350.  With the bacon wrap, I like the sear as it crisps the bacon right to the pork. 

To get this lovely meal out together, cook the lentils first and then begin browning the meat as you chop and saute the vegetables.  If one is done before the other, you've no worries.  The lentil-vegetable side will hold and reheat (and is good warm or cold with it's ending crunch of fresh carrots, etc.) and the meat has to rest anyway after roasting.  However you do it, you'll be happy.  I think so.  Did I mention leftover  the meat makes incredible tacos,  salads, omelet fillings, or sandwiches?  Or that this makes a tasty, easy Thanksgiving dinner for 2 or 3?  Let one friend bring pie and the other bring wine; you're set for the holiday.

Pork Tenderloin with Lentils and Vegetables 2-3 servings (plus lentil dish for lunches)

Vegetables:

1/2 pound lentils (any color), cooked and drained according to package directions --takes about 1/2 hour* 
3T olive oil, divided (1 to cook veg and 2 to drizzle on at end)
1 medium onion, chopped
1/2 cup each:  chopped eggplant, yellow squash, and zucchini (or green beans)
4 oz sliced mushrooms (1/2 a regular container)
1/4 cup   finely chopped red or green bell pepper
1/4 t each kosher salt and freshly ground black pepper (plus extra to taste)
Generous pinch of crushed red pepper
1/2 cup chopped fresh parsley
1/4 cup basil julienne (thinly sliced)
1/4 cup finely chopped yellow pepper
1/2 cup chopped tomatoes
1/4 cup chopped carrots
3 sliced green onions (white and green parts)

Juice of one lemon

  1. While lentils drain, heat a large, deep skillet over medium heat and add olive oil.  Saute onion, eggplant, squash, zucchini or green beans, mushrooms, and red or green pepper until softened--about 10 minutes.  Dust with salt and pepper and crushed red pepper.
  2. Turn off heat and add parsley, basil, yellow pepper, tomatoes, carrots, and green onions.  Stir in lentils and don't cook any longer.  ( A bit of a reheat is ok--see below.)
  3. Squeeze lemon juice over all and stir.
  4. Drizzle on other 2 tablespoons of olive oil.  Stir.
  5. Taste and adjust seasonings.
  6. Cover to keep warm until pork is finished .  You can reheat gently if you like.
Cooking the Pork: **

1 pork tenderloin
Kosher salt and freshly ground black pepper
1-2 slices best-quality bacon (I like Nueske's)
Toothpicks


Salt and pepper well the pork tenderloin and wrap it with the bacon pieces, securing ends with toothpicks.


  Meanwhile, heat a large, oven-proof skillet or heavy roasting pan over medium-high heat; add olive oil.  Place bacon-wrapped pork in the center of the pan. When the meat is very-well browned, turn and let brown on the other side. When that side is looking crispy, move the pan to the oven to finish cooking.  It may take another 15 minutes or so.  Using an instant-read thermometer, remove the skillet from the oven when the meat registers 150F.   I like it a bit rare and juicy; it will continue cooking.  Cover with aluminum foil for about 10 minutes before carving and serving.  Slice meat in 1/2"  pieces.  Place cut meat at the center of a large platter and surround with lentils and vegetables.


*Can cook lentils in the morning or night before.  Drain and refrigerate, tightly wrapped.  Spoon into the skillet with the cooked vegetables to warm through right before serving.

**These are directions I used for another blogpost in which the pork cooks just like this, but you also cook sliced fennel, onions, and apples right in the pan with the pork and then roast it all together in the oven.  That's nice, too--and mostly fallish!

Wine:  A Pinot Noir from Oregon.  Your choice, though I'm partial to Ken Wright pinots with meals like this.  Thanks, Ken.


Have fun cooking and taking care of yourself,
Alyce

Monday, October 3, 2011

Pumpkin Custard with Cinnamon Crème Fraiche

It's October.  The Solo Cook's thoughts turn to pumpkin.

Don't buy the little pie pumpkins.  Buy a  jack-o-lantern instead and carve it!   If you're going to make pumpkin anything, just buy plain canned pumpkin.  Yes, I know it qualifies as "processed" food, but so do canned green beans then.  I've done it both ways; the fresh pumpkins are no better.   And, you know, Libby has a corner on pumpkins; they actually get them cheaper.  So grin and bear it; buy canned.  Make some pumpkin bread and maybe a pie if you're invited to a fall dinner.

Sunday, September 25, 2011

Butternut (and other) Squash Soup


Ladle into your prettiest bowl and be happy.
 I know.  I know.  Everyone and her brother makes butternut squash soup in the fall.  And I do, too.  In November, I mean.  As a first course for Thanksgiving dinner.  That soup holds roasted pears and apples, bits of flyingly fragrant ginger and garlic, and is served with a small glass of Riesling to open a beautiful meal.  It might even have a drop or two of real cream as a garnish.

But this soup is not that long-winded, almost poutingly full bowl of autumnal bounty.  This soup is a 1-2 punch meal, light but nutritious and perfect for dinner with a bit of cheese and bread.  Almost better warmed up in the microwave at work the next day. It makes use of the rest of the zucchini (geez) or yellow (summer) squash, but takes into account the winter squash you couldn't resist at the market. Freeze a bowl or two for next week and you're done and feeling rich.  Here's the drill:
 
Chop your veg, season, and saute in a bit of oil.

Add the butternut squash.
2 quarts of stock and bring to a boil, then simmer until veg are tender.
 
Puree with an immersion blender (or in food processor blender)--or not.  It's tasty chunky, too.
 Butternut (and other) Squash Soup

2T olive oil
1 cup each chopped onion and celery
1 each:  small-medium zucchini and yellow (summer) squash, diced--no need to peel
1/2 cup chopped carrot
2 cloves minced garlic
Kosher salt and freshly ground pepper
Pinch of crushed red pepper
2 T fresh thyme, divided (or 1 1/2 tsp dried thyme, divided)
1/2 cup chopped fresh parsley
1/4 tsp ground ginger, optional
2 -3 cups chopped and peeled butternut squash
2 qts chicken or vegetable stock (plus or minus)
1/2 cup plain Greek yogurt, optional or 1/4 cup grated Parmesan cheese

In an 8-10 qt soup pot, saute over medium-high heat onion, celery, zucchini and yellow squash, and carrot until softened.  Add garlic and season liberally with salt and pepper.  Add crushed red pepper and 1T fresh thyme (or 1 tsp dried thyme), parsley, and ginger.  Cook, stirring, another minute or two.  Stir in butternut squash and cook a few minutes, stirring.  Add broth, stir well, and bring to a boil.  Reduce heat and simmer until vegetables are all tender--15-20 minutes.  Taste and adjust seasoning.  Puree with immersion blender or food processor or blender, if desired. If too thick, add a little more stock. If too thin, set back back on stove to simmer until reduced and thickened.  Ladle into bowls and garnish with a bit of thyme and a spoonful of Greek yogurt (or a sprinkle of Parmesan) if desired.  Serve hot.

Note:  This is a lovely meal for an ill friend. Go easy on the seasonings and check about the yogurt.

Have fun cooking and taking care of yourself,
Alyce

Friday, September 16, 2011

Greens Pasta--Pantry Meal


I topped mine with some teeny squash from my neighbor.
Once in a while a pantry meal is in order.  If you filled your pantry with things like whole wheat pasta, garlic,  olives, and olive oil...and if you have some fresh greens (arugula, spinach, etc) and even a piece of gratable cheese in the frig, you have dinner.  And you have a luscious dinner.  Good enough for you and, if you had a hankering, this is nice enough to share.  It'll stand up to a nice big red wine.  Did I mention it's vegetarian?   I've rewritten this little ditty with a few changes and also to make it sound as easy as it is, but the idea comes from Andrea Immer's (now Robinson) EVERYDAY DINING WITH WINE, and a lovely cookbook it is.  Thanks, Andrea!

Greens Pasta  2 servings

Cook up 1/2 pound whole wheat pasta (I like Whole Foods 365 brand best; it's tasty--) according to package directions.  Don't over cook it.  While it's cooking, saute in a large deep skillet 1-2 chopped clove(s) of garlic in 1 T of olive oil.  When the pasta it done, using tongs, transfer it to the skillet with the olive oil.  Toss well.  Add a couple of tablespoons of the pasta water. Add 1 cup of fresh spinach, chopped kale, spinach, or any greens you have.  Throw in a pinch of crushed red pepper.  Stir in a bit of grated cheese* and top with a last drizzle of olive oil, lots of black pepper, a good dose of salt and chopped olives, if you have them or like them.  Toss one last time and serve hot.  A bit of grated lemon zest is another addition you can consider--even at the table.

*Skip cheese for Vegan option

     Why not add those chopped, leftover vegetables you have from last night's dinner?   Or saute a few fresh ones like I did.
 
Here's what the T-Tiny squash looked like before I cooked it.  Pencil for scale.
Thanks, Wendy!

Add a good book and a candle and enjoy the meal.

 Have fun cooking and taking care of yourself,
 Alyce

Thursday, September 8, 2011

Herb-Butter Tuna

 
Herb Butter Tuna
If you need your main course in six minutes, this is your dinner.  Of course, if you want it done that fast, you'll need to buy the herb butter that tops this tuna.  Unless you are incredibly fast... and you might be.  In that case, make your own herb butter while the tuna cooks. 

If you like well-done tuna (tastes like pork tenderloin), you're going to need a little more time.  But not much.  You'd have time to, say, make a quick salad or phone call.  Nope, I'm wrong:   Skip the phone call while cooking--bad idea.  Let's just let the appliances in the kitchen be plugged in.

Add a couple of sides for a bigger meal--here with potatoes and squash.
The great thing about Herb-Butter Tuna is that you make a double dose and have enough for an entree salad the next day (or tacos, a sandwich, or wrap) or simply sweet, cold tuna chopped up for not so regular old tuna salad.

Sides?  I made two sides as it was a Friday night dinner I shared.  One was a saute of  thinly-sliced potatoes, carrots, onions, garlic and a bit of thyme--rather fall-like.  The other was some sliced snake squash (from my neighbor) that I sliced, cooked, and topped with chopped fresh, sweet red pepper and Italian parsley.

Sliced Snake Squash

Here's what this looks like whole... one of my favorite pics this summer.  Thanks, Wendy!
 At this time of year, a side of sliced tomatoes is probably plenty.  Still too warm for tuna and red wine (I typically like Pinot Noir with tuna)--try a no-Oak Chardonnay or an Oregon Pinot Gris or Pinot Blanc.  Here's how:

Herb-Butter Tuna

3T herb butter (instructions below or purchase pre-made)
2 tuna albacore steaks, about 6 oz each
olive oil
salt and pepper

 Pat tuna dry with paper towels and salt and pepper thoroughly. 

Heat a grill or grill pan (or skillet) over medium-high heat, brush with olive oil,  and add both tuna steaks.  Do not move the tuna around.  Let it sit to brown.  After 2 minutes (for rare) and 3 minutes (for medium rare), turn tuna over and repeat on the second side.  During last minute, top each piece of fish with half of the herb butter.  Cover with a pot lid, if needed, to melt butter, being careful to not overcook the tuna.  Let tuna sit one minute and serve hot.

Herb Butter
 *Herb Butter:  In a small bowl, mix well together (I use a wooden spoon)1 stick salted butter, 1-2 T each your choice of herbs (I like dill and parsley), 1T minced green onions, and a good pinch each of salt and pepper.  A bit of grated garlic is also a nice touch.  You can freeze this in tablespoons and take out just a bit to top vegetables, chicken, fish, or bread. 

South Beach Diet Note:  Do not choose the side with potatoes; stick with the squash.

Have fun cooking and take care of yourself,
Alyce  

Tuesday, August 23, 2011

Zucchini (Too Much!) for One

Zucchini-Almond Muffin
I hope you have a generous neighbor (as do I) who gardens...  Maybe he'll leave a tres giant zucchini on your back porch one day...

that makes people say things like, "Oh, my God!"  I guess this is sort of a giving thanks for copious amounts of food.  If you don't have a gardening neighbor or friend (and folks at church often bring these tomes to get rid of them after service), the farmer's market in St. Paul sells them for fifty cents.  Talk about food value.  While not as tender or flavorful as the tiny elegant zucchini that grace the plates of fine restaurants, these babies will still feed you.  (And anyone else who's hungry.)

An interesting aside about zucchini, which we usually think of as a vegetable.
Botanically, however, the zucchini is an immature fruit, being the swollen ovary of the female zucchini flower.
(This from Wikipedia, should we trust it.  YIKES.)

So here's two recipes for using up zucchini for the solo cook, who might often pass by a big zucchini:

 1.  Zucchini Cakes --  Fried up "pancakes" full of Parmesan and grated onion, they're hearty and healthy.

Zucchini Cakes--Eat 'em while they're hot.  Or not.

          You might have the cakes a time or two before they're gone.  I like them instead of sausage with fried eggs, sliced up over rice and topped with chopped green onions or dill, smothered in a layer of Greek yogurt and a good dose of black pepper, graced with a dop of great salsa, or just by themselves.  Yes, versatile!  Also fine hot, at room temp, or cold right out of the frig.

Ingredients:

3 cups grated zucchini (Squeeze excess moisture out in a towel or you'll have mushy cakes.)
3T minced or grated onion
1/2 cup flour (You might need a little more if mixture looks very liquidy before frying.)
1/2 t baking powder
1/2 t kosher salt
Pinch crushed red pepper, optional
1 egg, beaten well
1/4 c grated Parmesan cheese (plus more for garnish if you like)
2-3 T olive oil or butter for frying
Freshly ground black pepper

Toppings:  As you choose from above listings

Mix together all ingredients except oil/butter and pepper.  Heat oil/butter over medium - medium-high heat.  Shape zucchini mixture into patties about 3" in diameter and place in hot fat.  (Or spoon mixture into fat much like pancakes and smooth into shape.) Dust with black pepper.  Let cook 3-4 minutes until quite golden.  Carefully turn over, dust again with pepper, and fry the other side until golden. Serve immediately.  Or later.  Store tightly wrapped in the frig for up to 2 days.  Do not freeze.

Wednesday, August 17, 2011

Ratatouille (Not the Movie)

Ah, summer.


I loved the movie.
Also "The Big Night"
And "Babette's Feast"
Try them.   Food movies.  Ah.

I love the real deal better.   If you become a devoted cook, your world will revolve around the seasons.  Stews in winter.  Apple pie in the fall.  Berries in the spring.  And...
High summer: Tons of vegetables at their peak.

Tomatoes
Zucchini
Eggplant
Peppers
Garlic just  harvested

If you don't know ratatouille (the real deal), here's a definition from dictionary.reference.com:

 ra·ta·touille
[rat-uh-too-ee, -twee; Fr. ra-ta-too-yuh]  
noun
a vegetable stew of Provence, typically consisting of eggplant, zucchini, onions, green peppers, tomatoes, and garlic, served hot or cold.


My basil, yellow zucchini, and Japanese egglant in the bath together.

I am unsure if I would call it a "stew."  I'm thinking a melange suits my ratatouille better.  This mixture of great vegetables, some cooked separately and some together (all mixed in the end) is, like much cooking, a totally personal dish.  While it can be a side dish, a main, served over pasta (rice, cous cous), or in an omelet, it can contain various proportions (depending on your garden/taste or market) of the vegetables mentioned above.  It can have more or less (I like more) garlic.  It can have crushed red pepper.  Fewer tomatoes.

The vegetables could be grilled, then mixed.  Or sautéed in the typical way.  I have, in a pinch, frozen it and brought it out in late fall so we can close our eyes and drum up summer days.  Tell me how you make and use yours?   For a solo cook, this is perfect.  You can share with a vegan friend, keep some for tomorrow, cut the recipe in half, or do it all and throw containers in the freezer for lunches. Here's a starter recipe:

Thursday, August 4, 2011

Grilled Figs with Fresh Cheese, Thyme, and Honey


There is nothing terribly wrong with a Fig Newton.  Especially with a glass of milk. Or a cup of tea. There are worse treats.  Unfortunately, it's about the only way some people eat figs.  A few more buy dried figs at the holidays for some special baking project.  ("Now bring me some figgy pudding" probably isn't the one I'm talking about.)   Wine and cheese lovers often grab a few figs to eat with fresh cheese or salty ones like Manchego.  And nowadays, fig jam is a very popular condiment for a wine and cheese party if you have the six bucks or so for a small jar.  (I like to mix that jam with balsamic vinegar for an instant sauce for lamb chops.)

But fresh figs?  The average grocery shopper seldom sees them unless they live in California. (They're one of woman's oldest known foods, you know.)  But from now until the late fall, fresh figs are in season (albeit pricey) and there's a lot of bang for the buck.  While a pint container may be $7 or so, it's enough for dessert for four.  Which could be cheaper than your favorite ice cream.  Add some of that fresh cheese you made the other day and you're nearly set.

Out here in the northern middle-west (Minnesota, to be exact), the figs have just started coming into the high-end stores.  If you can't use them right away, they can be stored in the refrigerator for a few days.  The ones I bought last week were not terribly tasty fresh (they're a bit young), but they were perfect grilled.  Here's the drill:

Grilled Figs with Fresh Cheese, Thyme, and Honey  2 servings  (Have one tonight and one with your yogurt for breakfast.)
  • 2 figs, rinsed, trimmed of stems, and split in half
  • 1tsp vegetable oil
  • 2T fresh cheese (your own, goat, or ricotta will do)
  • 1T local honey
  • 1/2 t fresh thyme (plus a sprig for garnish)  or 1/4 t dry
  • 2 grinds of black pepper
Heat your gas grill (or your indoor grill pan on stove) to medium heat.  Brush with oil.
  1. Place split figs, open side down, onto grill.  Grill 1-2 minutes and carefully turn.  Grill for another minute or so and remove from the grill to a plate.
  2. Spoon a little cheese onto the center of each fig half and drizzle with honey.
  3. Sprinkle with thyme and a little black pepper.
  4. A little port (fortified wine made in Portugal and elsewhere) wouldn't go amiss.
According to California fig farmers, here are some important things to remember:
  • Look for the softest figs; a soft texture indicates the fruit is ready to consume immediately.  
  • Don't be concerned about small slits or tears in the skin as long as the fig has a fresh aroma.
  • Fresh figs are delicate. Handle gently.
  • Keep figs in the refrigerator for as long as five to seven days.
  • Too many to eat right away? Just rinse and freeze. Simply arrange in a single layer on a pan and put in the freezer. Transfer frozen figs to a sealed plastic bag, where they can be kept in the freezer for up to six months.
  • Avoid figs with a fermentation odor; it indicates that the fruit is overripe.  (courtesy Yahoo! News)
Have fun cooking and taking care of yourself,
Alyce

Sunday, July 24, 2011

Make Your Own Cheese (I call it 2-1 Cheese)

 
Alyce's Cheese
I always wanted to make my own cheese.
I'm not talking brie. I'm somewhat aware of my limits.  (Not that I would turn down a trip to France and an apprenticeship.)
I'm thinking goat's cheese.  I've been thinking (dreaming) goat's cheese for a long while.  But was my first try or two from goat's milk?  No.  Cow's milk it was.  And a lovely, firm (or soft...) kind of ricotta was my choice.

I have to admit I made this cheese by mistake.  I had read the directions for making ricotta and misremembered them.  Note to self:  keep recipe in front of your eyes the first time you make something.  The ricotta recipe called for 2 quarts of milk.  My memory called for 2 cups of milk.  So my cheese was firmer, denser, cutable, etc.  It turned out, unbeknownst to me, more like Indian paneer, which I didn't discover until later.

To digress a second time:  Goat's cheese is next--stay tuned.  First, read Goat Song by Brad Kessler.  If I could only read one book in a year, it would be this book.  Not because it's about goats and cheese, but because it's a beautifully written testimony to one man's decision to live a new life...and also ends up teaching a lot about the history of humankind.  NPR called it, "a wondrous little miracle of a book," and I couldn't agree more.

courtesy Scribner
 Anyone can make ricotta, but not everyone realizes that you can make it with a much smaller amount of milk, a longer drain, a harder squeeze... and you'll come out with a beautiful round of cheese you can slice (rather than a soft, spooned cheese).  This firmer product is perfect topped with a bit of honey and pepper, served on grilled salt and pepper baguette.  Or you could make lemon-ricotta pancakes (if you use the cheese before it's drained too long).   But I get ahead of myself.

  Note:  To make light, fluffy, fresh ricotta (maybe better for the pancakes) try David Lebovitz' directions on his guest post for Simply Recipes.

Let's ask, "Why you want to make cheese?"  There are a ton of reasons, but here are a few:

1.  You want to.
2.  It sounds like fun.
3.  You're tired of the price of fresh cheese in the store.  (Around 8 bucks for a small portion of this cheese.)
4.  You have whole milk about to go bad or yogurt you're not going to eat.
5.  You want really good quality.
6.  You want something special to take somewhere that tastes incredibly good and is easy and inexpensive.

Note I didn't say cheap.

Here it is...the soft stuff.  Yum.
 If you're a solo cook, you're well on the road to truly cooking well for yourself if you learn the difference between inexpensive and cheap.  You just don't want cheap.  You DO want inexpensive sometimes, but you want quality for your buck all the time.  Hence homemade cheese!

If you make this cheese, it will keep a week in the frig.  You will eat it all.  A bit each day.  (Try some of the fresh, soft cheese with peaches.)  Or you can take it to a party and be a bit hit.  You can double the recipe easily; just make sure you have a big enough piece of cheesecloth, a larger colander and a big bowl.  Then you can take some to your friends' house and keep some at home for your breakfast.  It is a bit like queso fresco, but not absolutely the same because it's yours.

Equipment you'll need to make this cheese:  2-3qt saucepan, colander, 4 layers of cheesecloth big enough to fit in the colander, a large bowl in which to catch the whey (the water that drips from the cheese.)

Cheese by You  or 2-1 Cheese 
2 cups whole milk
1 cup whole milk yogurt
2t white vinegar  (or try lemon juice some time)
1t salt
  • Mix all the ingredients together in a 2-3 qt saucepan.
  • Bring to a gentle boil and simmer 1-2 minutes.
  • Pour milk mixture through a cheesecloth-lined (about 4 layers) colander or sieve into a medium bowl.
  • Let drain 15 minutes for softer cheese or 30-45 for a more firm cheese.  You can decide yourself how long you want this to drain.  It's your cheese.  The cheese police aren't coming any time soon.
  • If you choose soft (15 minutes), spoon cheese into a bowl, cool, and refrigerate until needed.
  • If you choose firm (30-45 minutes), squeeze out all of the whey (the watery liquid that drains out of the curds) until you have a  solid, firm cheese in the cheese cloth.  To accomplish this, pull  the corners of the cheesecloth up together and twist/squeeze to create a cheesecloth "balloon."  Repeat 2-3 times.  The more you squeeze, the drier and firmer the cheese.
  • Unwrap the cheese and turn it out into a bowl for eating or storing in the refrigerator.  
  • Eat soft cheese as is or use in recipes like lasagne (or just mix into hot pasta).  It's excellent with ripe stone fruits, berries, etc (as you would with yogurt).  Slice the firm cheese cheese and eat as is or top with local honey and freshly ground black pepper.  Serve on grilled or toasted baguette dusted with salt.
  • Makes one approx 6" round of cheese.
      You need more cheesecloth than this, though I made it work...just!
      This is perfect with a little fresh pasta or peaches.  Needs nothing else.  Maybe a little pepper for the pasta.

      Drain longer and squeeze for a more firm cheese


      Drizzle a good dose of local honey on top and sprinkle with black pepper.

      Wednesday, July 13, 2011

      Herb-Spinach Egg White Omelet

       
      Egg white omelets are not for everyone.  Some people just don't get the yolk.  (Very bad; I know.)  They need yellow.  Even orange.  Others make the trip over to white easily, "This isn't bad!"  "Hey this is good!"  depending on what's in the omelet.  If you're in a spot where you seriously have to watch either calories or cholesterol, egg whites are your fine, fine friend.  But they're also a luscious, filling meal for just anyone who's going to dinner that night or who wants an extra piece of pizza the next day.

      On Weight Watchers, 3 egg whites are 1 point.  (And yes, they do have some protein.)  No complaint at all.  PAM the pan and skip the oil point, too.  A few chopped herbs...a little spinach...a dose of salsa.  Et voila!  Excellent use of leftover fresh herbs, which are (if you buy them) so expensive you feel like a wastrel if you don't use them all to make something.

      About buying egg whites:  you can break and separate eggs yourself, using the whites and cooking up the yolks for the dog or  you can buy egg whites in the dairy case near the eggs.  They come in small pint or quart cartons.

      A little giftie from my next-door neighbor:  basil, dill, flowering thyme.

      Herb-Spinach Egg white Omelet with Salsa and Fresh Tomatoes

      3 egg whites beaten with a healthy pinch of salt and pepper (white pepper, if you have it)
      PAM or 1T olive oil
      2 tablespoons chopped fresh herbs, your choice (parsley, basil, thyme, tarragon--even sage), plus
          a bit extra for garnish*
      1 cup fresh spinach
      1/4 cup salsa (I like Frontera Grill's if you don't make your own.) or 1T grated Parmesan cheese
      1 small-medium tomato, sliced


      1. Slice tomatoes; place on serving plate.  Add a few fresh herbs for garnish if you have extra.
      2. Heat pan over medium-high heat for a minute or so.  Add PAM or oil.
      3. Add spinach and herbs to hot, oiled pan, sprinkle with a bit of salt and pepper, and let cook 1 minute until a bit wilted.
      4. Add beaten egg whites to pan and let the white set  20 seconds or so.  Lift omelet at one edge with rubber spatula and tip pan to allow uncooked white into pan.  Repeat quickly until omelet is cooked, making a few small holes in the whites and vegetables (the omelet will reseal) if necessary to make sure eggs in the middle are cooked as well.  
      5. Turn off heat.  To plate, tip pan toward the plate, using the rubber spatula to slide the omelet out.  You may fold the omelet as you go or after it's on the plate.  It will eat however you do it and you'll become a better omelet maker as time goes on.
      6. Garnish with salsa or Parmesan and a quick dust of black pepper. (Or more white pepper is fine.)
      7. Enjoy hot, cold, or at room temperature.
      8. *If you have no fresh herbs, add a 1/4 tsp of your favorite dried herb to the spinach.  You could even try a bit of garlic, shallot, or green onion if you'd rather.
       

      If you like, you can watch a British chef do it a bit differently, but basically the same. Skip the commercial first!

      Have fun cooking and taking care of yourself,
      Alyce

      Wednesday, July 6, 2011

      The Best Cheesecake (clear throat) for any Birthday

      Pagliacci's New York Cheesecake...made and photographed this year in St. Paul

      I've made this cheesecake since, I think, 1984.  Almost always for Dave's birthday, but occasionally

      for other special occasions.   I dressed it up with chocolate and toffee for Sean's 30th.  I think I even stirred in some pumpkin and topped it with cinnamon/salted crushed pecans one fall.  Dave, however, likes it plain, plein, with nada, nothing, nip, zip, zing, big 0.  Says it needs nothing but a fork.  He's probably right, but I throw a few berries or drizzle chocolate sauce on it for other folks.  I've been known to make a cranberry compote for it for Thanksgiving or a New Year's Day buffet.


      Just a note about where this came from, though I didn't think about it for years.  I did vaguely remember a restaurant in Victoria, British Columbia and a bit of the story...but it wasn't until the internet became available that I went back and looked it all up.  Incredible:  the restaurant is still there (though I didn't have time to visit when we were in Victoria last spring) and the soup of the day (today) is Vegetable with Potato... also Split Pea with Ham.  And, you know, if you make something for long enough, it just becomes yours.  Even if you know it's  not.  Dave calls it "Alyce's Cheesecake."  And I've never changed the basic recipe, despite the above special occasion twists and tweaks.
         

      How I wish I were a better photographer...but these colors don't lend themselves to food photography anyway.  You get the idea.
       Other people have sort of tagged on to the cheesecake over the years.  If you've lived near one of our 24 houses in July, you might have had some.  Some friends texted this last week to find out if, by chance, we were coming back to Colorado for the 4th...it might have been the cheesecake.

      As The Solo Cook, you'll probably be invited to potlucks, dinners, picnics, etc., over the next how-many years. I freely give you permission to make and take YOUR cheesecake because:
      1. It's the best.  They'll love you.
      2. It's so easy to make, it's not funny.  There's no technique involved.
      3. You can't hardly ruin this.
      4. It's great any time of the year.
      5. It's flexible.  Forgiving.  Can be adapted to any flavor cheesecake.
      6. Can be made days and days ahead.
      7. Can be frozen for a month. (Cheesecakes freeze admirably well.)
      Let me know if you make it!

      You do need a 9" springform pan.  Yes, really, you must have it.
      A food processor or an electric mixer (even a hand-held one) is a must unless you're Superman.
      If you don't have a food processor for the graham cracker crumbs, you can buy them already crushed or put the crackers in a gallon sealed bag and pound or roll over them with a rolling pin.

      Pagliacci's New York Cheesecake                                         

      Crust

      • 1 1/4 cups graham wafer crumbs (I prefer vanilla wafer crumbs)
      • 1/4 cup sugar
      • 1/4 cup butter, melted

      Filling

                                                                 Directions:
      First:  Mix crumbs, 1/4 cup sugar and butter and press into a 10" spring form pan. Refrigerate until ready to use.
      1.  Preheat oven to 500º.  Make sure your oven is clean before you start!
      2.  Beat cream cheese with electric mixer in large bowl until very smooth. Blend in lemon juice and vanilla. Sift sugar, flour and salt together and gradually beat into cheese. Beat until creamy, smooth and light, about 5 minutes. Beat in eggs and yolks one at a time. Blend in cream. Pour into crust.  Place filled pan on a  baking sheet lined with parchment paper or foil.  
      3.  Bake 12 minutes.
      4.  Reduce oven temperature to 200º. Continue baking until tester inserted in centre comes out clean. The original recipe said for 45 minutes but I find it takes much longer.  Keep testing. (You can also set the oven at 300 and it's a lot less time.  I think the 200 might have been a typo??)
      5.  Run a sharp knife around the edge of the pan. Cool cake completely and refrigerate at least 24 hours before serving. 


      Have fun cooking and taking care of yourself,
      Alyce

      Friday, July 1, 2011

      Taking Potato Salad to the Picnic

      Happy, fresh, perky potato salad without all the...whatever
       My husband adores potato salad.
       His mother puts pickle juice in it.
      And it's darned good.

      I still don't make it often. It smacks of fattening mayonnaise, though I often make a closer-to-French version with a mustard-tarragon vinaigrette.  But there's no reason at all not to make it.  And it's lovely made with tiny new farmer's market potatoes, baby broccoli, fresh shallots, an ear of corn, and whatever else you've drug home.  In fact, let's just think of it as a salad.  That has potatoes in it.  Be inventive and put in what you have or like.  Tarragon or thyme would be sweet in place of the parsley.. if you like one of them better.  Tomatoes could be chopped for the top.  Asparagus or green beans, chopped, could be added in place of, or in addition to, the broccoli.


      St. Paul Farmer's Mkt display

      St Paul Farmer's Mkt sugar snaps


      I will tell you that many people ruin potato salad because they have no idea how to season it.  Some cooks will just pour in salt, when it's acid (vinegar or lemon juice) that's needed to kick the salad off. 

      And if it's too hot to leave that stove on, do make this.  It's all done in the microwave, so you save/eat all the nutrients that go down the drain if you boil the veg.  It is a bit of a pain to keep cooking things separately in the microwave, but it sure beats turning on the stove when it's 90 something and 75% humidity.  As your microwave could cook more slowly or quickly than mine, use the cooking times as a guide.  Taste your vegetables and see if they're done to your liking.  The potatoes, when left covered after cooking, will cook a bit more as they hold a good deal of heat.  If you like the other vegetables fresh, don't cook them!

      You've got something yum and healthy to take to the picnic.  Happy Fourth!

      Shallots from the market

      Pencil added for scale.  These are tiny, tender toothsome babies.

      Farmer's Market Potato Salad   (Made in the microwave)  4-6 servings
      1.5 # new potatoes (1-2" or cut into that size) cooked with 1/4 c water about 6 minutes covered.  Let sit 5 minutes before using.*
      2T olive oil
      3/4 t kosher salt; 1/4 t freshly ground black pepper; Pinch crushed red pepper
      1/2 new peas, or frozen  (If new, cook in microwave covered 2 minutes and drain; run cold water; drain. If frozen, run under warm water until unthawed and then drain.)
      2-3 stalks new broccoli, chopped (Cook for 2 minutes with carrots in 1T water & covered)+
      1 carrot, peeled and cut in matchsticks (Cook for 2 minutes with broccoli)
      1 ear of fresh corn (Leave husks on and cook 3 minutes or so.  Let sit in husks another 3-5 minutes before husking, taking off silks, and cutting the kernals off the cob while holding the cob upright on the board.)
      1/2 medium zucchini, cut into matchsticks (Don't cook.)
      1/2 red pepper (sweet), finely chopped
      2 eggs, boiled and chopped (PAM a medium bowl, add eggs, prick all over, cover tightly and microwave 2 minutes.  Cool and chop.)
      2 strips bacon (Cook in microwave w/ several paper towels above and below for 1 1/2 min.) Cool and  chop.*

      2 minced shallots
      4 minced green onions (Save a bit out for garnish.)
      1/4 c chopped parsley (Save a bit out for a garnish.)
      Juice of half a lemon (2-3 tablespoons)
      2T minced fresh dill
      1/2 c sour cream (in a small bowl at table)
      • Mix warm potatoes with oil, salt, pepper and red pepper.  Add peas though parsley.  Stir and taste. Adjust for seasonings. 
      • Add lemon juice; stir.  Taste again and add more juice if needed.
      • Garnish with reserved green onions, parsley and a big grind of pepper for their good looks and taste.  Sprinkle with finely chopped fresh dill.
      • If  desired, pass sour cream at table and let each guest top their salad with a spoonful.
      +If you have older/large broccoli, trim the stems and cut them off a bit (discard trimmings) before chopping for cooking.  Young, tender stalks should be fine.
      *You can use pancetta, too, though I'd chop it and gently fry it in a small skillet instead of microwaving it, though you probably could. Some people like to boil pancetta a bit before frying it...to remove the pancetta taste somewhat.  I don't do that, but do it if you like. Cooked, julienned ham is also an option.

      If you haven't frequented markets, here's one of my favorites:  (after the St. Paul Farmer's Market, of course)
       Photos from Pike Place Market in Seattle (taken in May, 2010)


      Have fun cooking and taking care of yourself,
      Alyce